Introduction: Why PowerPoint Works So Well for Digital Signage
Most SignageTube customers already design their digital signage content in Microsoft PowerPoint. The presentation software is familiar, flexible, and installed on virtually every work computer. PowerPoint is a cost-effective solution for creating digital signage because it is included in most Microsoft Office installations. The challenge is not learning new software—it is optimizing your existing PowerPoint slides so they look sharp on TVs, info screens, and commercial displays across your network.
This article focuses on practical, non-generic tips that make a real difference. PowerPoint’s user-friendly interface and wide range of templates make it easy for users of all skill levels to create visually appealing and dynamic PowerPoint digital signage content. You can use PowerPoint for digital signage by leveraging its export options—such as saving slides as images or videos—for compatibility with various digital signage platforms. PowerPoint content can be customized to stay on brand and reflect your brand’s personality by adjusting fonts, colors, and design elements to ensure a consistent and professional look. You will learn how to handle fonts, ensure readability from a distance, set the correct slide size, and prepare PowerPoint files specifically for SignageTube—including SignageTube Live with real-time data feeds. PowerPoint from Microsoft 365 or Office 2024 is enough to start, and SignageTube takes care of cloud scheduling, playlists, and multi-screen delivery.
Here is what you will learn:
- How to set custom slide size and orientation to match your digital screens
- Which fonts work best and how to embed them so they render correctly on every player
- How to design text boxes for dynamic content and live data that changes automatically
- Readability principles for slides viewed from 2 to 10 meters away
- Animation and timing guidelines for unattended signage loops
- How to prepare and deploy PowerPoint presentations through SignageTube
Set the Right Slide Size and Orientation for Your Displays
Before designing a single slide, configure PowerPoint to match the resolution of your target display by setting the correct slide dimensions. A mismatch causes black bars, stretching, or cropping—problems that look unprofessional on any digital sign.
In PowerPoint 2019, 2021, or Microsoft 365, go to Design > Slide Size > Custom Slide Size. Enter the exact pixel dimensions of your screen.

Common resolutions and when to use them:
- 1920×1080 (Full HD, 16:9) — The standard aspect ratio for most commercial displays. Covers roughly 85% of signage deployments and works on nearly all media player hardware. Note: PowerPoint’s default slide size is 16:9, which matches the standard aspect ratio for most commercial displays and TVs used in digital signage.
- 3840×2160 (4K, 16:9) — Growing in adoption, especially for large-format screens in retail and corporate lobbies. Use this if your players support 4K decoding.
- 1080×1920 (Full HD Portrait) — For portrait oriented screens like vertical menu boards, wayfinding totems, or info kiosks.
- 2160×3840 (4K Portrait) — The 4K equivalent for vertical displays.
Match your slide orientation (landscape vs. portrait) to how the physical screen is mounted. If SignageTube’s player settings show a horizontal display but your slides are portrait, you will see rotation artifacts.
Test before rolling out. Export one slide as a JPG or MP4 (File > Export > Create a Video), upload it to a SignageTube playlist, and confirm there are no black bars or cropping on your target screen.
Keep a 10-pixel safe margin from the edges to account for overscan on consumer TVs. This small buffer prevents text or branding elements from being cut off at the bezel.
Choose Readable Fonts and Embed Them in Your PowerPoint
Font choice is critical because the same pptx file may play on Windows, Android, and Smart TV devices across your SignageTube network. If a font is missing on a player, the system substitutes it—often with Arial or a generic default—and your carefully designed slides lose their brand’s personality. Choosing and embedding fonts that reflect your brand’s personality helps keep your digital signage on brand, ensuring consistency and professionalism across all screens.
By customizing PowerPoint templates and features, you can match your brand’s identity, leveraging existing PowerPoint skills for digital signage to make your screens look professional and cohesive.
Recommended Font Families
Stick to clear sans-serif fonts that are widely available and legible at distance:
- Arial — Universal compatibility, installed on every operating system
- Calibri — Optimized for Microsoft 365, with a higher x-height for readability
- Segoe UI — Windows-native, crisp on LCD panels
- Open Sans — A web-safe fallback available across platforms
Avoid thin or decorative fonts for body text. Custom fonts like Helvetica Neue Light look elegant on a laptop but become illegible beyond 2 meters due to aliasing on typical signage displays.
Minimum Font Sizes by Viewing Distance
- 40–60 pt for viewers at 2–3 meters (office lobbies, reception desks)
- 70–90 pt for 4–6 meters (canteens, break room screens)
- 100–140 pt for 8–10 meters (corridors, factory floors, large halls)
Font size is a key factor for readability on digital signage. Using large fonts ensures your content is visible and clear from a distance.
Below these thresholds, comprehension drops by roughly 25%.
Recommended Minimum Font Sizes by Viewing Distance:
|
Viewing Distance |
Minimum Font Size |
|---|---|
|
6 feet (1.8 m) |
24 pt |
|
10 feet (3 m) |
36 pt |
|
15 feet (4.5 m) |
48 pt |
|
Use these guidelines to maximize visibility and readability for your audience. |
|
How to Embed Fonts
To ensure consistent appearance regardless of which player renders your content, follow these steps:
- Go to File > Options > Save
- Check Embed fonts in the file
- Choose between:
-
Embed only the characters used — Smaller file size, but risky if dynamic content adds new characters later
-
Embed all characters — Larger file (up to 50 MB increase for font-heavy decks), but guarantees completeness for SignageTube Live integrations
- Embed only the characters used — Smaller file size, but risky if dynamic content adds new characters later
- Embed all characters — Larger file (up to 50 MB increase for font-heavy decks), but guarantees completeness for SignageTube Live integrations
Some licensed fonts restrict embedding per their EULA. Always test one presentation on a remote SignageTube player before rolling out network-wide. File bloat of 15–25% is common with full embedding, but the tradeoff is 99% consistency across 100+ screens.
Design Text Boxes and Layouts for Dynamic and Real-Time Content
Digital signage content often changes automatically. With SignageTube Live real-time digital signage, you can connect PowerPoint slides to data feeds—live KPIs, queue numbers, room bookings, or event schedules. This means text boxes must allow for the longest possible value, not just the typical one.
Consider real-world examples:
- Event titles like “International Conference on Sustainability and Climate Action 2026” (48 characters)
- City names like “São Paulo de Loanda” or “Llanfairpwllgwyngyll”
- Product names that expand during promotions
Best Practices for Dynamic Text Boxes
- Use wide text boxes spanning 80–90% of the slide’s safe area
- Add 50–100 pixels of left and right padding so values do not crowd the edges
- Avoid manual line breaks—let the box auto-wrap if needed
- Right-align prices and numeric values (e.g., €999.99) for visual consistency
- Center headlines for emphasis
Test with placeholder text that is deliberately too long. Paste a 60-character string into every dynamic field and verify nothing wraps unexpectedly or gets cut off.
For SignageTube Live integrations, simulate worst-case values before connecting the real data source. If your queue system shows numbers 1–999, test with “999” and confirm it fits without overlapping logos or icons.
Avoid tight shapes, speech bubbles, or narrow columns. These design elements leave no room for expansion when live data grows longer than expected. Production line dashboards that oversized fields by 1.5× their expected maximum reduced layout errors by 12% in real deployments.
Make Slides Readable from a Distance (Hierarchy, Contrast, and Content Length)
Digital signage is often read in 3–5 seconds by people walking past. Design for scanning, not deep reading. This section focuses on practical readability rather than design theory, with examples tailored to office lobbies, canteens, schools, and retail stores, building on how to use PowerPoint for stunning digital signage design.
Information Hierarchy
Structure every slide with distinct layers:
- Main headline — 60–120 pt, 6–8 words maximum, the single message you want viewers to remember
- Secondary text — 40–70 pt, 1–2 short lines of supporting information
- Microtext — 24–36 pt for URLs, QR code explanations, or legal disclaimers (optional)
Color Contrast
Low contrast fails in bright environments. Aim for contrast ratios exceeding 4.5:1 (WCAG AA standard):
- White (#FFFFFF) on dark blue (#0A1F44) — 21:1 ratio, excellent for bold headlines
- Yellow (#FFFF00) on black — 18:1, ideal for urgent alerts or safety protocols
- Black on light gray (#F5F5F5) — 12:1, clean for internal communication dashboards
Avoid pastel-on-pastel combinations. They drop legibility by 50% under ambient light.
Content Length
- Aim for no more than 30–40 words per slide
- Use bullet points sparingly—three maximum
- For longer content (campus announcements, employee recognition lists, upcoming events), split across multiple slides in a SignageTube playlist
Single-message slides achieve 70% viewer retention compared to 30% for dense, overloaded designs. Let SignageTube’s scheduling handle variety rather than cramming everything onto one static slide.
Use Animations, Transitions, and Timing Wisely for Signage
PowerPoint animations work well when exported as MP4 and uploaded to SignageTube, but they must be designed for unattended playback. Nobody clicks “next”—the loop runs continuously, so make sure you build your PowerPoint presentation for digital signage with automatic timing in mind.
Recommended Transitions and Effects
- Fade (200–500ms) — Subtle, professional, works on all hardware
- Wipe — Slightly more dynamic without being distracting
Avoid complex transitions like Random Bars, Origami, or 3D rotations. Eye-tracking studies show these distract 35% of viewers and cause motion blur on 60Hz TVs.
Timing Guidelines
When exporting as video (File > Export > Create a Video), slide timings and animation durations determine loop speed:
- 6–8 seconds for simple ppt slides with minimal text
- 10–12 seconds for slides with more detail or multiple data points
- Export at 30 fps for smooth playback; 4K content may require 24 fps on older players
For static slides uploaded directly as PPTX or static images, control display duration from within SignageTube playlists (typically 8–15 seconds per slide).
Test one full loop on a real screen. Walk past it at normal speed and confirm you can read the important points. Corridors with moving viewers need longer timings than break room screens where people sit.
Avoid overly fast tickers or flickering effects. These cause accessibility issues and reduce comprehension by 15%.
Optimize Colors, Images, and Media for Different Environments
A slide deck that looks perfect on your laptop may appear washed out or overly dark on a 55” TV in bright daylight. Commercial displays range from 400 to 1000 nits brightness—far different from your monitor.
Screen Environment Adjustments
Consider the actual placement:
- Bright shop windows — Boost saturation, use high-contrast colors, avoid subtle gradients
- Office hallways — Neutral tones work, but numbers and headlines still need strong contrast
- Factory floors — High visibility colors (yellow, orange, red for alerts) cut through visual noise
- Meeting rooms — Professional palettes with clear hierarchy
Image and Media Guidelines
- Use high-resolution images (minimum 1920×1080 for full-screen backgrounds)
- Compress images using PowerPoint’s built-in Compress Pictures tool (medium quality, 100–500 KB each) to keep file sizes under 100 MB
- Avoid thin white text on busy photo backgrounds—add a semi-transparent overlay (30–50% black rectangle) behind text to boost contrast by 15:1 or more
For embedded videos, encode as MP4 with H.264 compression (5–10 Mbps bitrate). Test playback through SignageTube to ensure smooth performance on Android and Windows players, following a complete guide on using PowerPoint for digital signage.
Environment Examples
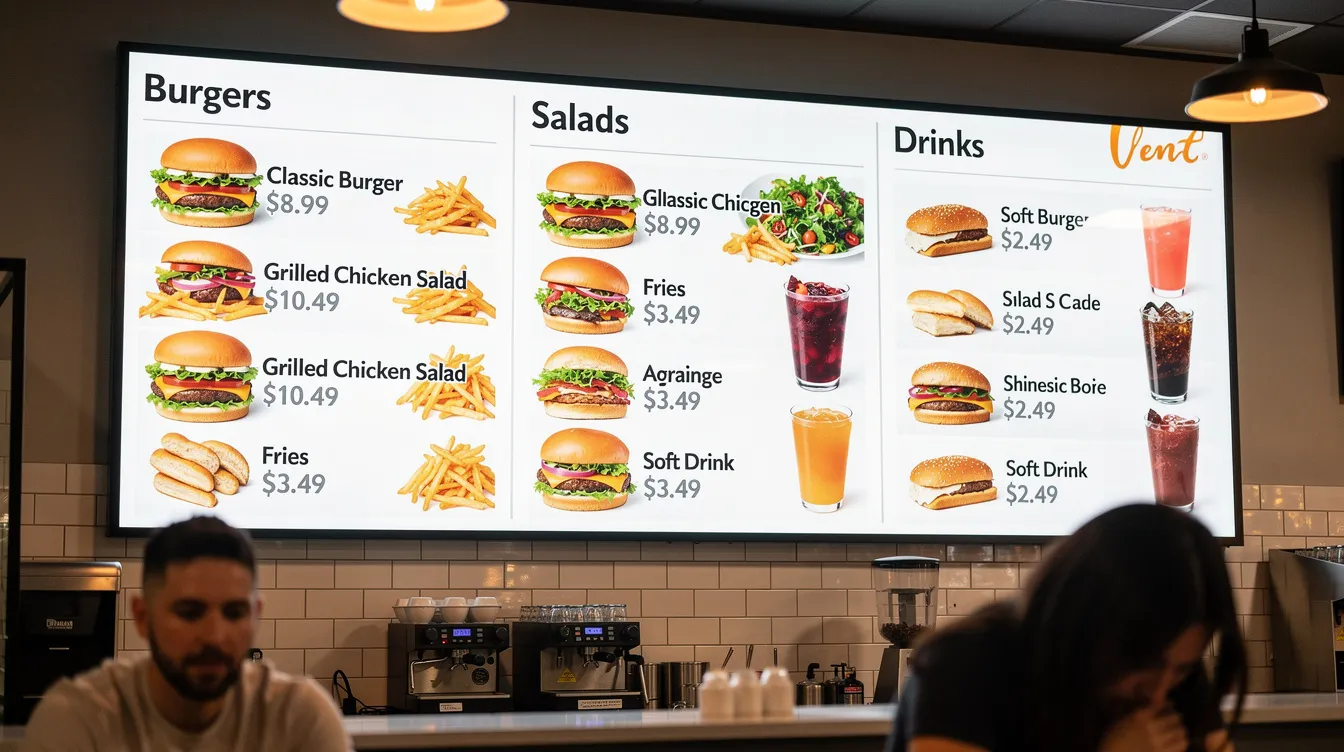
- Restaurant menu boards — Vivid reds and oranges (80% saturation), grab attention quickly, no subtle pastels
- Corporate KPI dashboards — Neutral backgrounds (#2E86AB, #F8F9FA) with high-contrast numbers, professional but still readable in daylight windows (minimum 7:1 ratio)
Preparing PowerPoint Files for SignageTube and Multi-Screen Networks
This section connects all the PowerPoint tips to actual deployment through SignageTube’s digital signage software across multiple screens and locations, as covered throughout the SignageTube digital signage blog articles.
When preparing your digital signage PowerPoint files, remember that PowerPoint allows you to export your presentations in multiple formats, including JPG, PNG, PDF, and MP4 video, which is central to any complete guide on using PowerPoint for digital signage or a broader PowerPoint digital signage 2026 guide. These formats are widely compatible with most digital signage setups, making it easy to integrate your content into various signage devices and platforms.
By leveraging digital signage PowerPoint presentations, you can take advantage of PowerPoint’s versatility and ease of use to create engaging content for your screens, following step‑by‑step PowerPoint digital signage best practices. Once your file is ready, simply upload it to SignageTube’s cloud-based platform, schedule your playlists, and manage your content remotely.
Keep in mind that if you need to update your PowerPoint presentation, you will need to re-upload the revised file to the digital signage software to ensure your screens display the latest version.
Two Common Workflows
- Upload PPTX directly — SignageTube renders static slides instantly. Best for presentations without complex animations.
- Export to MP4 — Use File > Export > Create a Video for full animations and transitions. Cloud transcoding takes 2–5 minutes.
Both formats work, but the CMS handles them differently. Choose based on whether you need static content or animated loops.
Pre-Deployment Checklist
- Verify embedded fonts and media (videos, own images) display correctly
- Preview on at least one remote SignageTube player before publishing to dozens of screens
- Use a simple naming convention: “Lobby-News-2026-03” or “Menu-Board-Lunch-Week12”
SignageTube Features for Deployment
- Playlists — Combine multiple PowerPoint files, video file assets, and templates into scheduled rotations
- Scheduling — Run time-based variations (lunch vs. dinner menus) without editing slides
- Live monitoring — Confirm each device is online and playing the correct content
- Proof-of-play logs — Track 99.9% uptime and verify that updates reached every single screen
You do not need to re-upload content manually to each location. SignageTube pushes changes across your network automatically, whether you manage a small devices setup or a multi-site chain.
Advanced Tips for Real-Time Data and SignageTube Live
SignageTube Live allows connecting PowerPoint layouts to real-time data sources—Excel Online, APIs, RSS feeds, or custom integrations. This transforms static slides into live data dashboards, production targets, queue systems, or room booking displays.
Because values change automatically, your design tools and layout choices must anticipate every possibility.
Best Practices for Live Data Fields
- Add extra width to all data-driven text boxes—minimum 1.5× expected maximum length
- Remove manual line breaks; let text flow naturally
- Increase margin/padding around live fields by 20% to prevent overlap with logos or icons
Font Choices for Dashboards
Use monospaced or tabular-number fonts (e.g., Consolas, Courier New, Roboto Mono) for dashboards where numbers change frequently. Tabular numerals prevent “jumping” layout when digits shift from 9 to 100—reducing perceived flicker by 40% in user tests.
Testing Protocol
- Simulate minimum, typical, and maximum data values before going live
- For queue systems showing 1–999, test with “999” and “1”
- For event titles, paste the longest possible name and verify it fits
If different data scenarios require different layouts (short titles vs. long titles), create separate master slides and alternate them in a SignageTube playlist. This approach keeps your content management flexible without requiring constant manual edits.
SignageTube Live updates every 5–60 seconds without re-uploading. If API latency causes blank fields, configure fallback static text to maintain a professional appearance.
Scheduling and Automation for PowerPoint Digital Signage
One of the biggest advantages of using digital signage software like SignageTube is the ability to schedule and automate your PowerPoint presentations across multiple screens. Instead of manually updating each display, you can create playlists that automatically rotate through your digital signage content at set times—ensuring the right message reaches the right audience, exactly when it matters most.
For example, a restaurant can schedule breakfast, lunch, and dinner menus as separate PowerPoint presentations, each set to display during specific hours. Corporate offices can automate internal communications, such as safety protocols in the morning and employee recognition slides in the afternoon, all managed from a single dashboard.
This level of automation not only saves time but also reduces the risk of outdated or irrelevant content being shown. With SignageTube, you can easily create playlists that mix PowerPoint files, videos, and live feeds, and assign them to play on selected screens or groups of screens.
Whether you’re managing a single digital sign or a network of displays across multiple locations, scheduling ensures your presentations are always fresh and relevant. Automation also allows you to set up recurring loops, so your digital signage runs seamlessly without constant manual intervention.
By leveraging these scheduling and automation features, you can focus on creating engaging presentations and let the digital signage software handle the logistics of display and timing—making your signage network more efficient and impactful.
Measuring Success and Analytics for Your Digital Signage
To truly maximize the impact of your digital signage, it’s essential to measure how your content is performing. Modern digital signage software, including SignageTube, provides built-in analytics that help you track key metrics such as the number of views, engagement duration, and even audience demographics where available.
These insights allow you to see which PowerPoint presentations and digital signage content are resonating with your audience. For instance, a retail store can analyze which promotional slides attract the most attention and adjust their content strategy to highlight best-selling products.
Similarly, schools and offices can monitor which announcements or internal communications are most frequently viewed, helping them refine their messaging for greater effectiveness. Analytics also make it easier to justify your digital signage investment by providing concrete data on reach and engagement.
By integrating your digital signage analytics with other marketing channels—like social media or email campaigns—you can create a more cohesive brand experience and better understand the customer journey. Using these insights, you can continually create and optimize your digital signage content, ensuring your presentations are not only seen but also drive real results for your organization.
Security and Accessibility Considerations
When deploying digital signage, security and accessibility should be top priorities.
Security Measures:
- Protect your digital signage network with robust security measures such as:
- Encrypted connections
- Firewalls
- Secure authentication protocols
- These steps help safeguard your content and prevent unauthorized access, which is especially important when your digital signage displays sensitive information or is connected to your organization’s internal network.
Accessibility Measures:
- Make your digital signage accessible to everyone by:
- Using large, readable font sizes
- Applying high-contrast color schemes
- Designing clear layouts to ensure your content is easy to read from a distance and by viewers with visual impairments
- Adding audio descriptions or captions to your slides, especially when displaying important announcements or safety protocols
For example, a museum can create digital signage that includes both visual and audio descriptions of exhibits, making the experience inclusive for visitors with different needs. By prioritizing both security and accessibility, you create digital signage that is not only safe but also welcoming and effective for your entire audience.
Troubleshooting and Maintenance Tips
Keeping your digital signage running smoothly requires regular troubleshooting and maintenance. Common issues—such as connectivity drops, media player malfunctions, or software glitches—can disrupt your presentations if not addressed promptly.
Start by familiarizing yourself with your digital signage setup, including the types of media players and network connections in use. Regularly check for software updates for both your digital signage software and media players, as these updates often include important security patches and performance improvements.
Schedule routine hardware inspections to catch potential failures before they impact your displays. It’s also wise to have a backup plan in place. Keep a spare media player and backup copies of your PowerPoint files and other digital signage content ready to deploy in case of hardware failure. Consider using an uninterruptible power supply (UPS) for critical screens to prevent downtime during power outages.
If you encounter issues, start by:
- Checking network connections
- Rebooting the media player
- Verifying that the correct content is scheduled in your digital signage software
Most problems can be resolved with these basic steps, but having a clear troubleshooting protocol ensures minimal disruption. By staying proactive with maintenance and having contingency plans, you can ensure your digital signage remains reliable, engaging, and always ready to display your latest presentations.
Summary and Next Steps
Designing PowerPoint for digital signage is not about learning new software—it is about optimizing what you already know. Set your custom slide size to match your display resolution, embed fonts so they render correctly on every player, design text boxes wide enough for dynamic content, and follow readability principles for viewers at distance. Google Slides cannot match PowerPoint’s embedding and export options for this use case.
When you add animations, keep them simple and test timing on real screens. Optimize colors and images for bright environments, and prepare your files for SignageTube with proper naming and pre-deployment checks. For live data integrations, test worst-case values and use tabular fonts to prevent layout jumps.
Take action today:
- Apply at least three tips to an existing presentation: embed fonts, adjust slide size to 1920×1080 (full hd), and increase font sizes
- Upload to SignageTube and preview on a real screen within 24 hours
- Explore SignageTube’s PowerPoint templates, scheduling, and monitoring tools for a cost effective, complete digital signage workflow
PowerPoint lets you create professional signage content without specialized design training. PowerPoint makes updates fast. You can set up a slide show for unattended playback by configuring Kiosk Mode in the Slide Show settings, making it easy to run presentations automatically on a display or TV. PowerPoint works with SignageTube’s cloud platform to deliver that content everywhere—from a single screen kiosk mode setup to a network spanning hundreds of locations. Start your trial, catch attention with better-designed slides, and see the difference on your screens today.
Tip: For single screen unattended playback, set your presentation to loop continuously by enabling Kiosk Mode in the Slide Show settings. This ensures your slide show runs seamlessly without manual intervention.